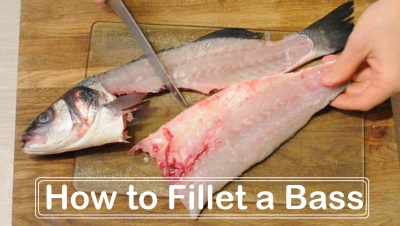
Filleting a fish properly is an important skill for any angler to master. For bass in particular, filleting them correctly allows you to get the most meat possible off the fish in nice, boneless fillets ready for cooking. This article will provide a complete guide on how to properly fillet various species of bass, from understanding their anatomy, having the right tools, and step-by-step instructions. With some practice, you’ll be an expert at filleting bass in no time.
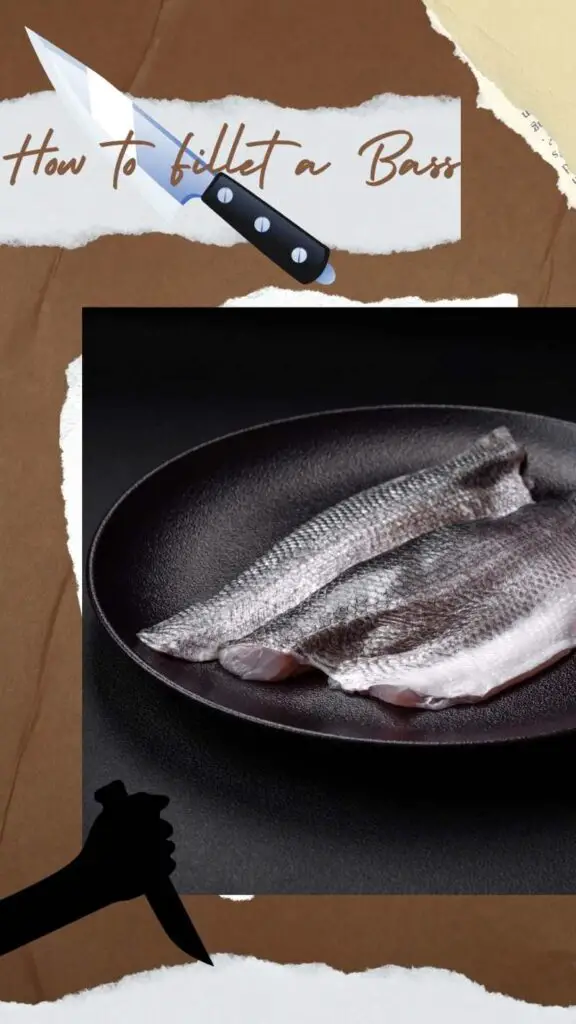
Table of Contents
Understanding Bass Anatomy
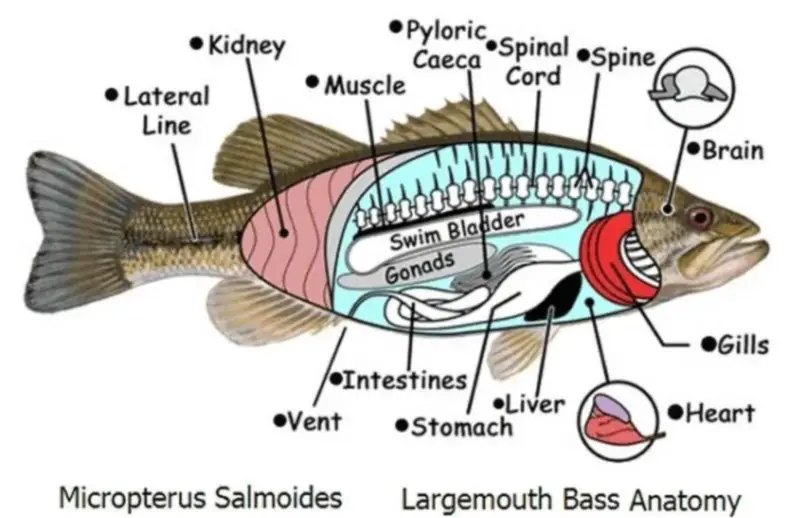
To fillet a bass efficiently, it helps to understand some key features of its anatomy. Bass have a long, slender body shape built for swimming fast and striking at prey. Their skeletal structure includes a spine running down the top side, with ribs extending from it on the underside. The spine splits into the tail fin at the rear. Bass have two pectoral fins on the upper sides and two pelvic fins on the bottom. There are small, sharp spines in the dorsal, pectoral and pelvic fins as a defense mechanism. Different bass species like largemouth, smallmouth and spotted have only subtle differences in their anatomy.
Necessary Tools for Filleting a Bass
Having the right tools will make filleting a bass much easier. The most important is a sharp fillet knife – look for one about 6-7 inches long with a flexible blade. The flexibility allows you to cut cleanly along the bone structure. A sturdy cutting board, ideally with a rubber bottom to prevent slipping, is also a must. Other useful tools include a pair of needle nose pliers for pulling out pin bones, a ruler to check fillet thickness and paper towels for keeping your hands dry.
Step-by-Step Guide to Filleting a Bass
Now let’s go through each step of the filleting process in detail:
To start, make sure the bass is properly prepared by removing all scales and internal organs. Give the fish a good rinse under cold water to wash away any debris or blood. Having a clean canvas to work with makes filleting easier.

Lay the bass flat on its side on a stable cutting board. Use one hand to grip the head firmly in place. This prevents the fish from sliding around as you cut.
The first incisions will be just above the pectoral fins, the side fins located near the gills. Angle the knife down towards the backbone and make a cut through the flesh down to the ribcage.
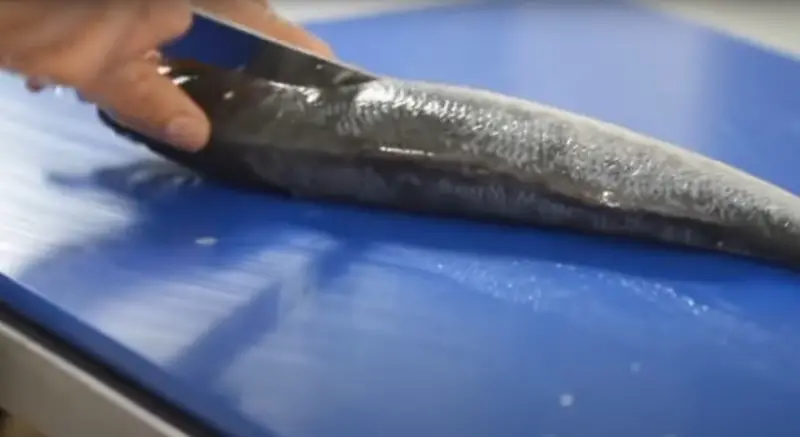
Next, position the knife right along the fish’s spine starting at the initial incision. In one smooth motion, slice along the spine by applying gentle pressure with the knife while working from head to tail. The goal is to cut the entire top fillet off in a single pass. Repeat this cut on the bottom side of the spine to remove the second fillet.
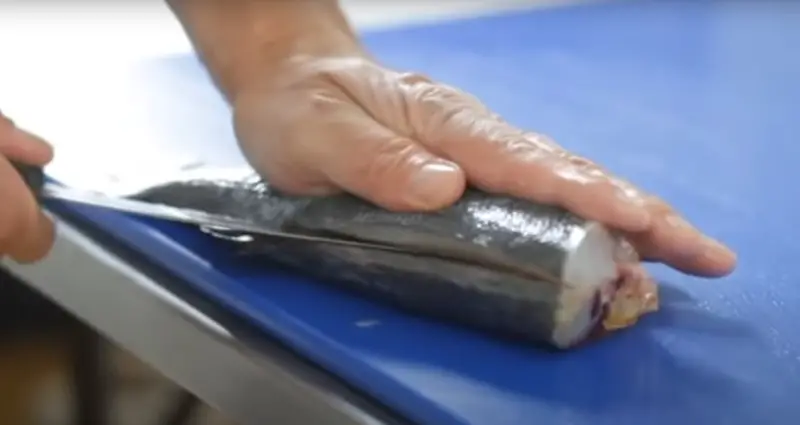
After both fillets are freed from the bone structure, flip them over and trim off any ribs still attached using short cuts. Also detach the fillets from the thin underside flesh and skin.
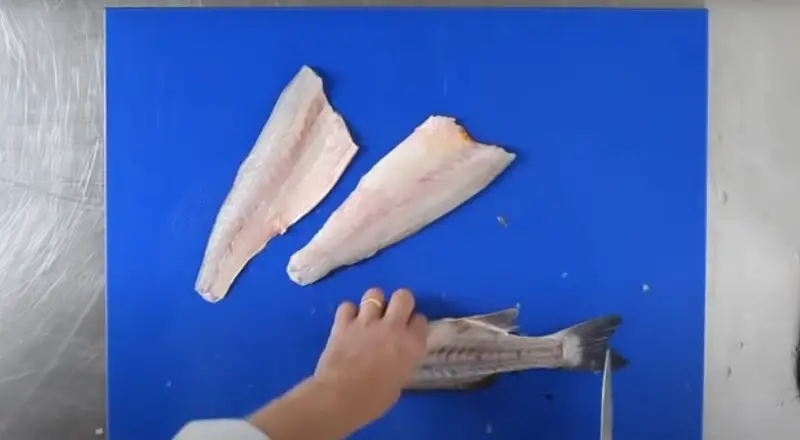
Finally, finish up by laying the fillets skin-side down and using pliers to pull out any small pin bones. Cut away the skin and portion the fillets as desired. Rinsing and chilling helps preserve freshness.
Tips and Tricks for Perfect Bass Fillets
To get perfect bass fillets, follow these tips and recommendations.
By following these tips when filleting bass, you will quickly master the art of getting perfect boneless fillets.
Storing and Cooking Your Bass Fillets
Bass fillets can be safely stored in the refrigerator for 3-4 days. To maintain their freshness, place them flat in a dish or Ziploc bag and brush with lemon juice. This citrus touch serves not only to enhance flavor but also to aid in preservation. These versatile fillets lend themselves to various cooking techniques such as sautéing, baking, frying, and grilling. Incorporate them into tacos, sandwiches, pasta dishes, or bread and fry for a delightful meal. Explore the culinary possibilities of bass fillets to savor the best of your catch, ensuring a delicious dining experience.
Safety Precautions
- Create stable, clutter-free workspace with secure cutting board. Choose well-lit area without tripping hazards.
- Wear cut-resistant glove on non-dominant hand and eye protection to minimize injury risk.
- Ensure knives sharp and in good condition. Replace dull blades which can slip. Exercise caution when handling sharp tools.
- Keep fingers away from knife path. Use firm but gentle fish grip to maintain control. Position non-cutting hand away from blade.
- Use controlled, deliberate knife movements. Avoid rapid, forceful actions that can lead to accidents. Focus on precision over speed.
- Have first aid kit and basic medical knowledge available in case of accidents. Have someone nearby who can assist if needed.
- Maintain clean workspace by promptly disposing of waste and wiping surfaces. Prevents slips and improves efficiency.
- Carefully read and follow instructions for specialized tools like electric knives. Proper use and maintenance improves safety.
- Take breaks if fatigued or losing focus. Filleting requires concentration. Knowing personal limits enhances safety.
Conclusion
With the right techniques and tools, filleting a freshly caught bass is a very satisfying experience for an angler. Learning to work cleanly around the bone structure while removing every bit of the sweet, delicate flesh takes practice but is a valuable skill. Refer back to these steps and tips whenever preparing your next bass catch. Soon you’ll be a filleting pro creating beautiful, boneless fillets ready for your favorite recipes.
FAQ
What are the essential tools needed for filleting a bass?
Filleting a bass requires a set of specific tools to ensure a clean and efficient process. Here’s a detailed list of essential tools for filleting a bass:
Fillet Knife: A sharp fillet knife is crucial for the task. The blade should be flexible to follow the contours of the fish bones, and the length should be appropriate for the size of the bass. A blade length of 6 to 9 inches is commonly used.
Cutting Board: Choose a stable and non-slip cutting board with enough space for the bass. A cutting board with a groove around the edges helps contain liquids and keeps the workspace tidy.
Fish Pliers or Grippers: These tools can be used to secure the slippery bass while filleting. Grippers hold the fish firmly, reducing the risk of injury and making the process more controlled.
Fish Scaler: While not essential for filleting, a fish scaler can be handy for removing scales before filleting if the bass still has them.
Fish Cleaning Gloves: Optional but recommended, gloves provide a better grip on the bass and protect your hands from cuts and fish slime.
Fish Fillet Glove: For added safety, consider wearing a fillet glove made of cut-resistant material to protect against accidental slips with the knife.
Fish Tweezers or Pliers: To remove any remaining pin bones, a pair of tweezers or pliers designed for fish can be very useful.
Knife Sharpener: Maintain the sharpness of your fillet knife throughout the process with a knife sharpener. A dull knife can make the filleting process more challenging and less precise.
Trash Bag or Bucket: Have a designated container nearby for fish scraps and waste, making cleanup easier.
Paper Towels or Cloth: Keep some towels or a cloth handy to wipe your hands, the knife, and the cutting board during the filleting process.
Container with Water: If you’re filleting multiple fish, having a container with water to rinse the knife and hands between fillets helps maintain cleanliness.
Are there any specific techniques for filleting large bass compared to smaller ones?
Yes, there are some specific techniques for filleting large bass compared to smaller ones. Filleting larger bass can be a bit different due to their size and bone structure. Here’s a detailed guide on the techniques for filleting large bass:
Initial Cut:
For larger bass, start by making an incision behind the pectoral fin and just below the head. Angle the cut slightly towards the head.
Extend the cut along the lateral line towards the tail. Adjust the angle of the knife to follow the contour of the ribcage.
Rib Cage:
Larger bass may have thicker rib bones. Use the tip of the knife to navigate around the rib cage, gently cutting along the bones to avoid waste.
Some anglers prefer to make a separate cut along the top of the ribcage to lift the fillet away more cleanly.
Y-Bone Removal:
Larger bass often have a Y-bone structure in the fillet, which can be more prominent than in smaller bass.
After removing the initial fillet, locate the Y-bones by running your finger along the centerline of the fillet. Make a V-shaped cut on each side of the Y-bones to remove them.
Skinning:
Skinning large bass fillets can be easier than with smaller ones due to the thickness of the skin. Make a small cut at the tail end of the fillet to get a good grip on the skin.
Hold the skin firmly with one hand and use the other to slide the knife between the flesh and the skin, applying gentle pressure.
Trimming:
Trim any excess fat and red meat from the fillet. Larger bass may have thicker sections of red meat along the lateral line, and trimming these portions enhances the taste and texture of the fillet.
Check for Remaining Bones:
Run your fingers along the fillet to check for any remaining pin bones. Use tweezers or pliers to remove them.
Adjust Knife Angle:
When filleting larger bass, adjusting the angle of the knife to follow the natural curvature of the fish is crucial. This helps maximize meat yield and ensures a cleaner fillet.
Is it better to fillet a bass fresh or after freezing it?
Filleting a bass fresh is generally preferred by those who enjoy the taste and texture of freshly caught fish. Fresh filleting allows you to take advantage of the fish’s optimal flavor and ensures a tender texture. If you plan to consume the bass shortly after catching it, filleting it fresh is a good choice.
On the other hand, freezing the bass before filleting can be practical in certain situations. Freezing helps preserve the fish for a more extended period, allowing you to fillet it at a more convenient time. This can be useful if you have caught more fish than you can consume immediately or if you want to store the fish for later use.
Ultimately, the decision depends on your preferences, timing, and storage capabilities. If you have the opportunity to enjoy the bass shortly after catching it, filleting it fresh is often the preferred option. If you need to store the fish for a longer duration, freezing it before filleting can be a practical choice.
What is the best angle to approach the filleting process for optimal meat yield?
The optimal angle for filleting a fish to achieve the best meat yield depends on the specific type of fish and your personal preference. However, a common approach is to angle the knife slightly downward toward the backbone while making long, smooth cuts.
Here are some general tips:
Start at the Head: Begin your cut behind the pectoral fin and the head. Insert the knife at a slight angle towards the head to follow the contour of the fish.
Follow the Backbone: As you proceed, follow the backbone, angling the knife slightly downward to maximize the meat yield. Glide the knife along the ribs, keeping it as close to the bones as possible without cutting into them.
Tail Section: When you reach the tail section, angle the knife to follow the natural curvature of the fish. This helps in obtaining as much meat as possible from the tail.
Skinning: If you prefer skinless fillets, you can remove the skin after the initial fillet is removed. Lay the fillet skin-side down on the cutting board, insert the knife between the meat and the skin, and use a back-and-forth motion to separate the two.
Repeat on the Other Side: Flip the fish and repeat the process on the other side to get the second fillet.
Can you recommend any specific fillet knife brands or types for bass?
There are several reputable fillet knife brands that are well-regarded for their quality and performance. When choosing a fillet knife for bass, consider factors such as blade material, flexibility, sharpness, and handle comfort. Here are some recommendations:
Rapala:
Rapala is a well-known brand in the fishing industry and offers a variety of fillet knives. Their knives are often praised for their sharpness and durability. The Rapala Fish ‘n Fillet series is popular among anglers.
Bubba Blade:
Bubba Blade is known for producing high-quality fillet knives with non-slip grips and stainless steel blades. The Bubba Blade Flex Fillet Knife is a favorite among many anglers.
Victorinox:
Victorinox is a reputable Swiss brand known for its quality kitchen and outdoor knives. Their fillet knives, such as the Victorinox Swiss Army Fibrox Pro Fillet Knife, are known for their sharpness and precision.
Shun Cutlery:
Shun is a Japanese brand that produces high-quality knives. While they are known for their chef’s knives, some of their models, like the Shun Cutlery Kanso 6-Inch Utility and Boning/Fillet Knife, can be suitable for filleting bass.
Morakniv:
Morakniv is a Swedish brand that offers affordable and reliable knives. The Morakniv Fishing Comfort Fillet Knife is a popular choice for anglers, known for its sharp stainless steel blade.
Dexter-Russell:
Dexter-Russell is a well-established brand in the commercial fishing industry. The Dexter-Russell SofGrip Fillet Knife is favored for its ergonomic design and sharp blade.
Are there any tricks for removing the skin effectively while filleting a bass?
Yes, there are tricks for effectively removing the skin while filleting a bass. Here’s a step-by-step guide to help you remove the skin efficiently:
Make a Initial Cut:
Start by making an incision just behind the pectoral fin and the head. Angle your knife slightly towards the head and cut through the flesh until you reach the skin.
Secure the Skin:
To get a good grip on the skin, use a pair of pliers or hold the skin with a clean, dry kitchen towel. This helps you maintain control and prevents the fish from slipping.
Hold the Knife Parallel:
With the skin secured, hold your fillet knife parallel to the cutting board. Insert the tip of the knife between the skin and the flesh at the point where you made the initial cut.
Maintain a Low Angle:
Keep the blade at a low angle, almost parallel to the skin. This helps you separate the flesh from the skin with minimal waste.
Use a Sawing Motion:
Using a sawing motion, gently work the knife along the length of the fillet, keeping it close to the skin. The key is to let the knife do the work and not apply excessive force.
Adjust as Needed:
If you encounter resistance or if the skin isn’t separating easily, you may need to adjust your angle or grip. Be patient and make slight adjustments as necessary.
Continue to the Tail:
Continue working the knife along the skin until you reach the tail. Ensure that you’ve separated the fillet entirely from the skin.
Inspect for Residual Skin:
After removing the skin, inspect the fillet for any residual pieces of skin. Trim them away with the knife if needed.
How do you handle the rib bones during the filleting process?
Handling rib bones during the filleting process involves a few key steps to ensure you remove them cleanly from the fillet. Here’s a general guide on how to handle rib bones when filleting bass:
Make the Initial Cut:
Start by making an incision along the top of the fish, just behind the pectoral fin and the head. Angle your knife slightly towards the head.
Follow the Backbone:
As you continue the cut, follow the contour of the backbone, and angle the knife slightly downward. This initial cut will separate one side of the fillet from the fish.
Locate the Rib Bones:
Once you’ve made the initial cut, you’ll encounter the rib bones. They run along the underside of the fillet. Use the tip of your knife to feel for the rib bones.
Cut Along the Rib Bones:
With the rib bones located, make a cut along the rib cage, using the rib bones as a guide. Angle the knife so that it runs along the bones, separating the fillet from the rib cage.
Lift and Trim:
Lift the fillet gently as you continue to cut along the rib bones. Use the tip of the knife to carefully trim the fillet away from the ribs. Ensure that you get as much meat as possible while leaving the bones behind.
Repeat on the Other Side:
Flip the fish and repeat the process on the other side to obtain the second fillet.
Inspect for Remaining Bones:
After filleting, inspect each fillet carefully for any remaining bones, especially small pin bones. Remove them using tweezers or fish pliers.
What is the recommended thickness for bass fillets?
The recommended thickness for bass fillets can vary depending on personal preference and the cooking method you plan to use. However, a common guideline is to aim for fillets that are approximately 1/2 to 3/4 inches thick.
This thickness provides a good balance for cooking. Fillets in this range are thick enough to retain moisture during cooking, preventing them from drying out, but not so thick that they cook unevenly. Thicker fillets may require longer cooking times and can be more challenging to cook evenly.
When filleting bass, try to maintain a consistent thickness throughout the fillet. This ensures even cooking and a more enjoyable dining experience. Adjust the thickness based on your cooking preferences – thinner fillets may be suitable for quicker cooking methods like pan-frying or broiling, while slightly thicker fillets work well for grilling, baking, or more substantial preparations.
Ultimately, the recommended thickness can be influenced by the specific recipe you’re following and your personal taste preferences. Adjustments can be made based on the cooking method and the desired texture of the finished dish.
Are there any alternative filleting methods for bass besides the traditional method?
Yes, there are alternative filleting methods for bass besides the traditional method. The choice of method often depends on personal preference, the size of the bass, and the desired outcome. Here are a couple of alternative filleting methods:
Butterflying:
Butterflying involves cutting the bass in a way that allows it to open up like a butterfly. To do this, make a deep, lengthwise cut along the backbone on one side, stopping just before reaching the skin. Repeat the process on the other side. This method is suitable for grilling or stuffing the bass.
Chunking or Steak-Cutting:
Instead of filleting the bass into boneless pieces, you can opt for chunking or steak-cutting. Make crosswise cuts perpendicular to the backbone, creating thick steaks with bones. This method is ideal for grilling or baking, and it preserves the bone-in flavor.
Ceviche-style Cutting:
Ceviche is a method where the fish is cut into small, bite-sized pieces and then marinated in citrus juice. For bass, you can fillet the fish and then cut the fillets into smaller pieces suitable for ceviche. The acid in the citrus juice “cooks” the fish without heat.
Fillet Removal with Rib Bones Intact:
Instead of removing the rib bones during filleting, you can leave them intact. This method preserves the structure of the fish, and you can later remove the rib bones after cooking if desired. It’s a variation that can be suitable for baking or grilling.
Our best posts:
- Lifetime Kayak Reviews;
- Ideas and Suggestions for Funny Kayak Names;
- Best River Kayak;
- Best Kayak Cart For Sand;
- Best Fish Finder For Kayak;
- Best Monofilament Fishing Line For Spinning Reels;
- Vibe Shearwater 125 Review;
- Best Kayaks for Dogs;
- Best Inflatable Kayak For Whitewater;
- Kayak Trolling Motors.

